Navigate the interface
After you log in to the application and select a case on the Portal Home page, the Case Home page appears. The features that appear on the Case Home page depend on your user category and permissions, so you may not see all of the features on this page.
Note: The Case Home page is the default start page. On the Security > Groups > [group name] > Properties page, an administrator can change the group default start page to any of the following pages: Documents, Search, Transcripts, Production Pages, Security, Case Setup, Manage Documents, Review Setup, or Analysis. For more information, see Edit group properties.
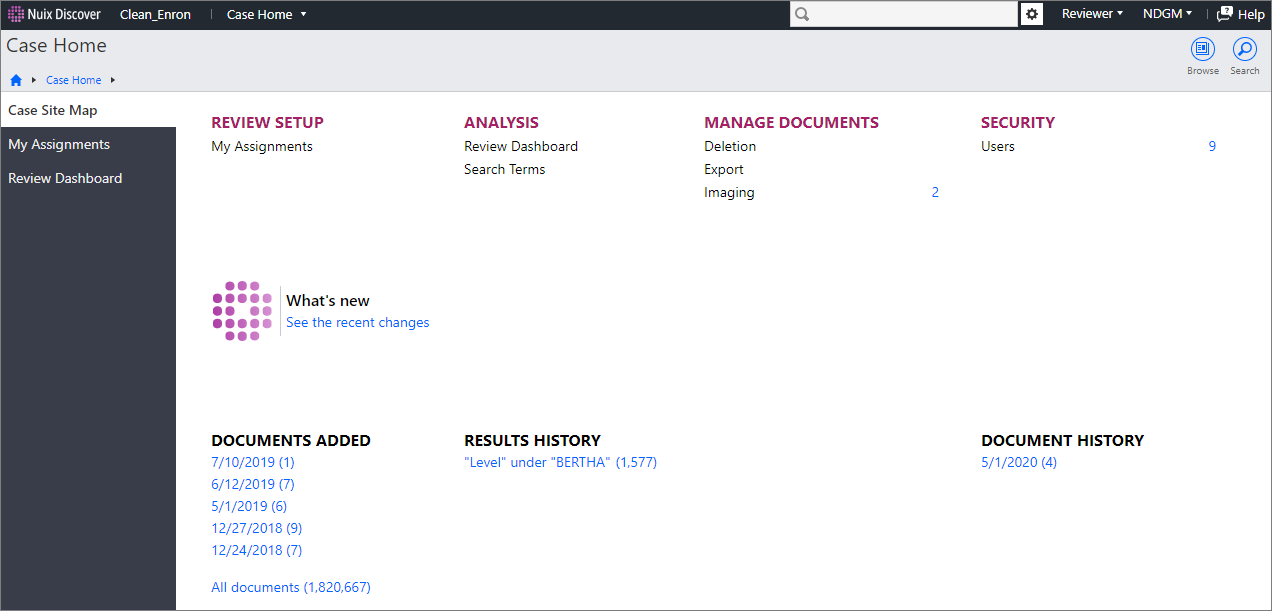
Group members have access to a basic set of features. An example of what a group member may see on the Case Home page is shown in the following figure.

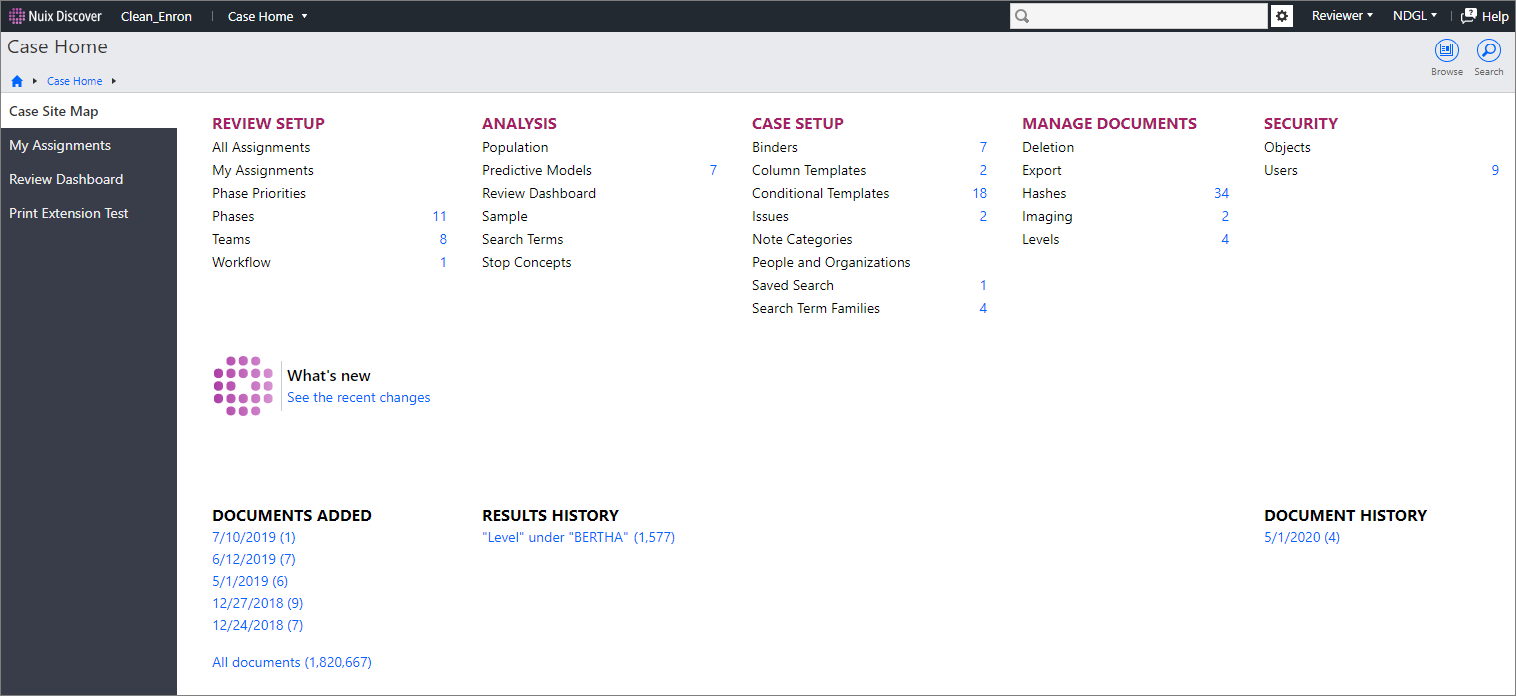
Group leaders generally have access to more features than group members. An example of what a group leader may see on the Case Home page is shown in the following figure.

All sections of the Case Home page include the following items:
Navigation bar: The navigation bar at the top of the page includes the following items (from left to right):
Nuix Discover logo: Click the application logo to navigate to the Portal Home page from any page in the case. You can open a different case from the Portal Home page.
Case name: Click the case name to return to the Case Home page from any page in the case.
Case Home menu: Use this menu to access different areas of the application, such as the Documents page or the Review Setup page. Options for the Case Home page, Documents page, and Search always appear. The Transcripts option appears if you have permission to access transcripts that are loaded in the case, and the remaining menu options appear if you have permission to access the associated pages.
Quick search box: The quick search box always appears. For information about how to search for documents using the quick search box, see Perform a quick search.
Quick search menu: Use this menu to change the quick search options. The options that appear on this menu depend on your permissions.
Group name and menu: If you belong to multiple groups, you can switch between groups that are listed on the menu.
User name and menu: Hover over your user name to view details. To log out of the application, click Log out on the menu. You can also click the user name menu to set search preferences, reset your workspace to the default settings, or access bookmarks.
Help button: Click Help to open the Help window. The application searches for content based on the page in the application that you are using when you click the Help button. You can also search for an exact phrase using the search box. The search results include content from a variety of resources, such as the documentation, knowledge base articles, training videos, and white papers.
If search results do not appear, the application displays the following message: “Sorry, no results found. Try another search?” You can type text in the search box, or click the Documentation button to open the online documentation. You might also see buttons to submit a support ticket (Ticketing) or contact customer support (Get Help).
Note: To view the documentation and other help resources, you might have to enable pop-up windows in your web browser .
Breadcrumb and breadcrumb menu: Breadcrumbs allow you to track and navigate back to the application pages. Click the arrow next to the Home button to open the breadcrumb menu, which displays the same list of application pages as the Case Home menu.
Information bar: The information bar at the bottom of every page provides copyright and version information.
Depending on your permissions, the following pages appear in the navigation pane:
Case Site Map page: The Case Site Map page always appears. This page includes the following items:
Toolbar: The toolbar includes the following items:
Browse button: Click this button to open the Documents page with a workspace that contains the Browse pane.
Search button: Click this button to create a new advanced search on the Search page. For information about how to build searches on the Search page, see Perform an advanced search.
Feature sections: The features that appear in the Review Setup, Analysis, Case Setup, Manage Documents, and Security areas depend on your permissions and on your user category.
History lists: The following lists appear on the bottom of the Case Home page:
Documents Added: This list displays documents that were recently added to the case. This list also include a link to all documents in the case.
Note: On the Security > Features page, your administrator must grant your group access to the Case Home - Documents added feature.
Results History: This list displays the five most recent sets of documents that you accessed, such as search results, assignments, or binders. Click a link to open the documents.
Document History: This list displays the documents that you accessed during the five most recent dates that you were active in the application. Click a link to open the documents.
My Assignments page: The My Assignments page displays a list of your active and suspended assignments. Click Get next assignments to retrieve your next assignment.
For more information about how to access and manage your assignments, see Get your assignments.
Review Dashboard page: The Review Dashboard displays a progress bar, graph, and reviewer table that illustrate the progress of an active review.
For information about how to analyze the data on the Review Dashboard, see Work with the Review Dashboard.
Concept Cloud page: The Concept Cloud displays a word cloud of the concepts that were found in a specific document set. The larger the word, the more common the concept is. You can display concepts for all documents in the case, or for documents in a binder, issue, population, sample, or workflow or phase. Use the slider to hide common concepts and display less common concepts. To view documents that contain a concept, click a word in the Concept Cloud.
Work with the Documents page
You work with documents on the Documents page. The Documents page is where you can browse documents, create simple and advanced searches, and review and code documents in the various panes, such as the Browse pane, Map pane, List pane, View panes, Code pane, Conditional Coding pane, Related pane, and Timeline pane.
You can access the Documents page from the Case Home page in any of the following ways:
To display the Documents page and browse for documents, on the Case Home menu, click Documents.
This opens the Documents page to the last-opened results set. If no previous results exist, such as when you open the application for the first time, then the Search page opens.
To perform a quick search and return a results set on the Documents page, type a search term in the Quick search box and click a result.
To display the Documents page and browse for documents, on the toolbar, click Browse.
To display a recent results set on the Documents page, on the Case Home page, under Documents Added, Results History or Document History, click a link.
If you select a link under Documents Added, Results History, or Document History, or perform a quick search, the results set appears on the Documents page.

For information about how to display different panes on the Documents page, see Customize the workspace.
The main Documents page is available to all users. The features and related options that appear depend on your permissions.
The Documents page also includes some or all of the following items on the toolbar:

Search results arrow: Use the arrows on the left to quickly browse through results sets.
Search results: Click the search results to open the search.
Documents arrows: Use the arrows on the right to quickly browse through documents.
Centralized document information: Appears below the search results arrows.
The following information and actions are available on the toolbar (from left to right):
Search preferences indicators: The following buttons indicate your search preferences, as set on the user name menu or on the Search page.
The first button indicates whether the documents are renditions.
The second button indicates whether the documents are threaded.
The third button indicates whether the documents include sources and attachments.
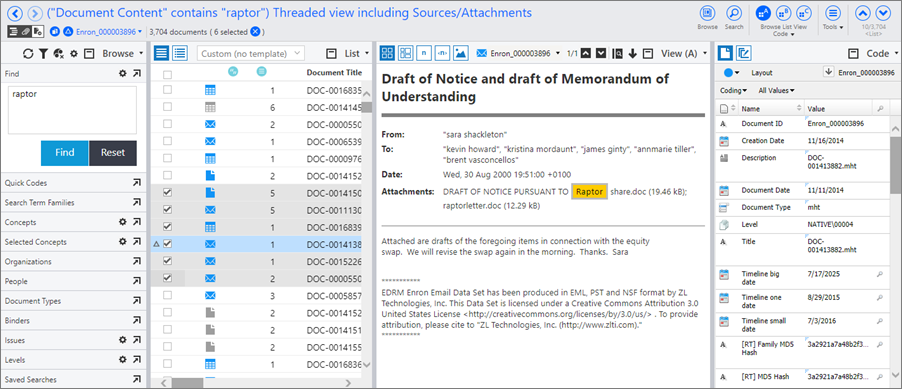
Note: As shown in the previous figure, in this example, the search preferences and results include Renditions, but do not include Threading or Sources and attachments. You can click any of these buttons to rerun your current search with different search preferences. For more information about how to rerun your current search with different search preferences, see Perform an advanced search.
To copy the document ID of the active document, click the Copy active document ID to the clipboard button.
Note: If you cannot copy the active document ID to the clipboard, adjust your browser settings.
The triangle icon indicates the active document. The number next to the triangle icon indicates the document ID of the active document.
You can click the document ID to open the document in a new workspace, copy the web address of the active document, or find similar documents.
The number of documents in the search results.
The number of selected documents. To clear the selection, click the Deselect all documents button (X).
Browse: Click Browse to open a workspace that contains the Browse pane, if it is not already open.
Search: Click Search to perform an advanced search on the Search page.
Workspace buttons and menu: To change the arrangement of panes on the Documents page, click a different workspace button. To launch a menu that allows you to add a new workspace, modify an existing workspace, or select workspaces to display on the toolbar, click the arrow.
History: Click History to view the document history and results history.
Tools: Customize the toolbar by pinning frequently used features from the Tools menu to the main toolbar.
Tip: To increase the height of your workspace, you can collapse the Documents page toolbar. Click the Collapse button on the navigation bar, next to the Help button.